请注意,本文编写于 519 天前,最后修改于 350 天前,其中某些信息可能已经过时。
目录
编译安装环境
系统:centos7.9
安装编译依赖
yum gcc gcc-c++ make automake -y
下载依赖软件源码包并且解压
bash# 新建文件夹
mkdir /data/download/nginx -p
cd /download/nginx
# 下载
wget http://nginx.org/download/nginx-1.24.0.tar.gz
wget https://www.openssl.org/source/old/1.1.1/openssl-1.1.1v.tar.gz
wget https://www.zlib.net/zlib-1.3.tar.gz
wget https://zenlayer.dl.sourceforge.net/project/pcre/pcre/8.45/pcre-8.45.tar.gz

# 解压并且重命名
tar -xf ./openssl-1.1.1v.tar.gz -C /data/download/nginx/ --transform s/openssl-1.1.1v/openssl/
tar -xf ./zlib-1.3.tar.gz -C /data/download/nginx/ --transform s/zlib-1.3/zlib/
tar -xf ./pcre-8.45.tar.gz -C /data/download/nginx/ --transform s/pcre-8.45/pcre/
编译安装nginx
bash# 创建www用户
useradd www

# 解压
tar -xf nginx-1.24.0.tar.gz
# 进入解压后目录
cd nginx-1.24.0
# 配置安装
./configure --prefix=/data/apps/nginx --user=www --group=www --with-pcre=../pcre --with-openssl=../openssl --with-zlib=../zlib --with-http_v2_module --with-http_sub_module --with-http_ssl_module --with-http_mp4_module --with-http_flv_module --with-http_gzip_static_module --with-http_auth_request_module --with-http_secure_link_module --with-http_slice_module --with-http_realip_module --with-http_stub_status_module --with-file-aio --with-stream --with-stream_ssl_module --with-stream_realip_module --with-stream_ssl_preread_module --without-select_module --without-poll_module --without-http_ssi_module --without-http_userid_module --without-http_geo_module --without-http_memcached_module --without-mail_pop3_module --without-mail_imap_module --without-mail_smtp_module --http-client-body-temp-path=/dev/shm/client_body_temp --http-proxy-temp-path=/dev/shm/proxy_temp --http-fastcgi-temp-path=/dev/shm/fastcgi_temp --http-uwsgi-temp-path=/dev/shm/uwsgi_temp --http-scgi-temp-path=/dev/shm/scgi_temp

# 编译并且安装
make -j8 && make install
添加启动脚本
bash# 创建启动脚本目录
mkdir /data/apps/init.d/ -p
# 创建nginx启动脚本
touch /data/apps/init.d/nginx
# 编辑启动脚本
vi /data/apps/init.d/nginx
启动脚本如下显示
bash#!/bin/bash
# chkconfig: 2345 93 11
# description:Nginx Server

NGINX_HOME=/data/apps/nginx
NGINX_SBIN=$NGINX_HOME/sbin/nginx
NGINX_CONF=$NGINX_HOME/conf/nginx.conf
NGINX_PID=/data/logs/apps/nginx/nginx.pid
NGINX_MAXFD=655350

NGINX_NAME="Nginx"

. /etc/rc.d/init.d/functions

if [ ! -f $NGINX_SBIN ]
then
    echo "$NGINX_NAME startup: $NGINX_SBIN not exists! "
    exit
fi

start() {
    ulimit -HSn $NGINX_MAXFD

    $NGINX_SBIN -c $NGINX_CONF
    ret=$?
    if [ $ret -eq 0 ]; then
        action $"Starting $NGINX_NAME: " /bin/true
    else
        action $"Starting $NGINX_NAME: " /bin/false
    fi
}

stop() {
        $NGINX_SBIN -s stop
    ret=$?
    if [ $ret -eq 0 ]; then
        action $"Stopping $NGINX_NAME: " /bin/true
    else
        action $"Stopping $NGINX_NAME: " /bin/false
    fi
}

restart() {
    stop
    sleep 2
    start
}

check() {
    $NGINX_SBIN -c $NGINX_CONF -t
}

reload() {
    $NGINX_SBIN -s reload
}

relog() {
    kill -USR1 $(cat $NGINX_PID)
}

case "$1" in
    start)
        start
        ;;
    stop)
        stop
        ;;
    restart)
        restart
        ;;
    check)
        check
        ;;
    reload)
        reload
        ;;
    relog)
        relog
        ;;
    *)
        echo $"Usage: $0 {start|stop|restart|reload|check|relog}"
        exit 1
esac
wq保存以上脚本
添加启动脚本执行权限
bashchmod +x /data/apps/init.d/nginx
配置nginx
进入nginx配置文件目录cd /data/apps/nginx/conf/
删除除了fastcgi_params、mime.types以外的配置文件
bashrm -f `ll | sed -n '1!p' | awk '{print $NF}' | grep -v 'fastcgi_params' | grep -v 'mime.types'`
创建nginx.conf主配置文件
vi nginx.conf
保存以下配置到nginx.conf上
bashuser www;
worker_processes auto;
#error_log /data/logs/nginx/nginx_error.log;
#pid /data/logs/nginx/nginx.pid;
error_log /data/logs/nginx/error.log notice;
pid /data/tmp/nginx.pid;
worker_rlimit_nofile 65535;

events {
  use epoll;
  worker_connections 65535;
}
http {
  include mime.types;
  default_type  application/octet-stream;
  charset utf-8;
  server_tokens off;

  gzip on;
  gzip_min_length  1k;
  gzip_buffers     16 64k;
  #gzip_http_version 1.0;
  gzip_comp_level 9;
  gzip_types      application/json text/plain application/x-javascript text/css application/xml;
  gzip_vary on;

  log_format  access  '$remote_addr - $remote_user $host [$time_local] "$request" '
             '$status $request_time $bytes_sent $body_bytes_sent "$http_referer" '
             '"$http_user_agent" "$http_x_forwarded_for" '
             '"$ssl_protocol" "$upstream_addr" "$upstream_cache_status" "$upstream_status" $upstream_response_time' ;

  log_format  json  '{"timestamp":"$time_iso8601",'
                      '"remote_addr":"$remote_addr",'
                      '"remote_user":"$remote_user",'
                      '"body_bytes_sent":$body_bytes_sent,'
                      '"bytes_sent":$bytes_sent,'
                      '"domain":"$host",'
                      '"method":"$request_method",'
                      '"http_referer":"$http_referer",'
                      '"http_user_agent":"$http_user_agent",'
                      '"url":"http://$host$request_uri",'
                      '"request_file":"$uri",'
                      '"request_time":$request_time,'
                      '"status":$status,'
                      '"upstream_addr":"$upstream_addr",'
                      '"upstream_response_time":"$upstream_response_time",'
                      '"upstream_status":"$upstream_status",'
                      '"upstream_cache_status":"$upstream_cache_status"}';

  client_header_buffer_size 16k;
  large_client_header_buffers 8 16k;
  server_names_hash_bucket_size 512;
  sendfile on;
  tcp_nopush on;
  keepalive_timeout 60;
  tcp_nodelay on;
  client_header_timeout 10;
  client_max_body_size 30m;
  client_body_timeout 120s;
  client_body_buffer_size 256k;
  client_body_temp_path /dev/shm/client_body_temp;
  proxy_connect_timeout 800;
  proxy_read_timeout 800;
  proxy_send_timeout 800;
  proxy_buffer_size 64k;
  proxy_buffers 32 64k;
  proxy_busy_buffers_size 128k;
  proxy_temp_file_write_size 128k;
  proxy_temp_path /dev/shm/proxy_temp;
  proxy_set_header Host $host;
  proxy_set_header X-Real-IP $remote_addr;
  proxy_set_header REMOTE_ADDR $remote_addr;
  proxy_set_header X-Forwarded-For $proxy_add_x_forwarded_for;
  fastcgi_connect_timeout 800;
  fastcgi_send_timeout 800;
  fastcgi_read_timeout 800;
  fastcgi_buffer_size 256k;
  fastcgi_buffers 8 512k;
  fastcgi_busy_buffers_size 512k;
  fastcgi_temp_file_write_size 512k;
  fastcgi_temp_path /dev/shm/tmp;
  proxy_hide_header X-Powered-By;
  proxy_hide_header Server;


    upstream backend{
        server unix:/data/tmp/php-www1.sock weight=10 max_fails=3 fail_timeout=3s;
        server unix:/data/tmp/php-www2.sock weight=10 max_fails=3 fail_timeout=3s;
  }

    upstream backend_php7{
        server unix:/data/tmp/php-www5.sock weight=10 max_fails=10 fail_timeout=3s;
        server unix:/data/tmp/php-www6.sock weight=10 max_fails=10 fail_timeout=3s;
  }

  map $http_upgrade $connection_upgrade {
        default upgrade;
        '' close;
   }


  include /data/apps/nginx/conf/hosts/*.conf;

 }
创建fcgi.conf文件并且把下面配置存到这个文件上
bashfastcgi_param	GATEWAY_INTERFACE	CGI/1.1;
fastcgi_param	SERVER_SOFTWARE		nginx;

fastcgi_param	QUERY_STRING		$query_string;
fastcgi_param	REQUEST_METHOD		$request_method;
fastcgi_param	CONTENT_TYPE		$content_type;
fastcgi_param	CONTENT_LENGTH		$content_length;

fastcgi_param	SCRIPT_FILENAME		$document_root$fastcgi_script_name;
fastcgi_param	SCRIPT_NAME			$fastcgi_script_name;
fastcgi_param	REQUEST_URI			$request_uri;
fastcgi_param	URI			$uri;
fastcgi_param	ARGS			$args;
fastcgi_param	DOCUMENT_URI		$document_uri;
fastcgi_param	DOCUMENT_ROOT		$document_root;
fastcgi_param	SERVER_PROTOCOL		$server_protocol;

fastcgi_param	REMOTE_ADDR			$remote_addr;
fastcgi_param	REMOTE_PORT			$remote_port;
fastcgi_param	SERVER_ADDR			$server_addr;
fastcgi_param	SERVER_PORT			$server_port;
fastcgi_param	SERVER_NAME			$server_name;

# PHP only, required if PHP was built with --enable-force-cgi-redirect
fastcgi_param	REDIRECT_STATUS		200;
创建hosts目录
mkdir /data/apps/nginx/conf/hosts
在/data/apps/nginx/conf/hosts/目录下创建localhost.conf配置文件
bashserver
  {
    listen       80;
    server_name localhost;
    # server_name 可以写自己的访问ip
    index index.php index.html index.htm;
    include spider.conf;

    location ^~ / {
        index index.html index.htm index.php;
        root /data/www;
        location ~ \.php$ {
            deny all;
            try_files $uri =404;
            fastcgi_pass   backend_php7;
            fastcgi_index  index.php;
            include        fcgi.conf;
        }

        location  ~ .*\.(css|gif|jpg|jpeg|png|bmp|js|swf|ico|cur|mp4|avi|mpg)$ {
            expires 30d;
        }
    }

    access_log  /data/logs/nginx/localhost_access.log  access;
    #access_log off;
}
创建相关目录
bash#访问日志目录
mkdir /data/logs/nginx
# 添加归属
chonw -R www.www /data/logs/nginx

# 静态文件路径
mkdir /data/www
# 添加归属
chonw -R www.www /data/www
启动nginx
复制静态文件
cp /data/apps/nginx/html/index.html /data/www/
测试
bash/data/apps/nginx/sbin/nginx -t
显示如下就可以进行下一步启动nginx了

启动
bash/data/apps/init.d/nginx statr
测试
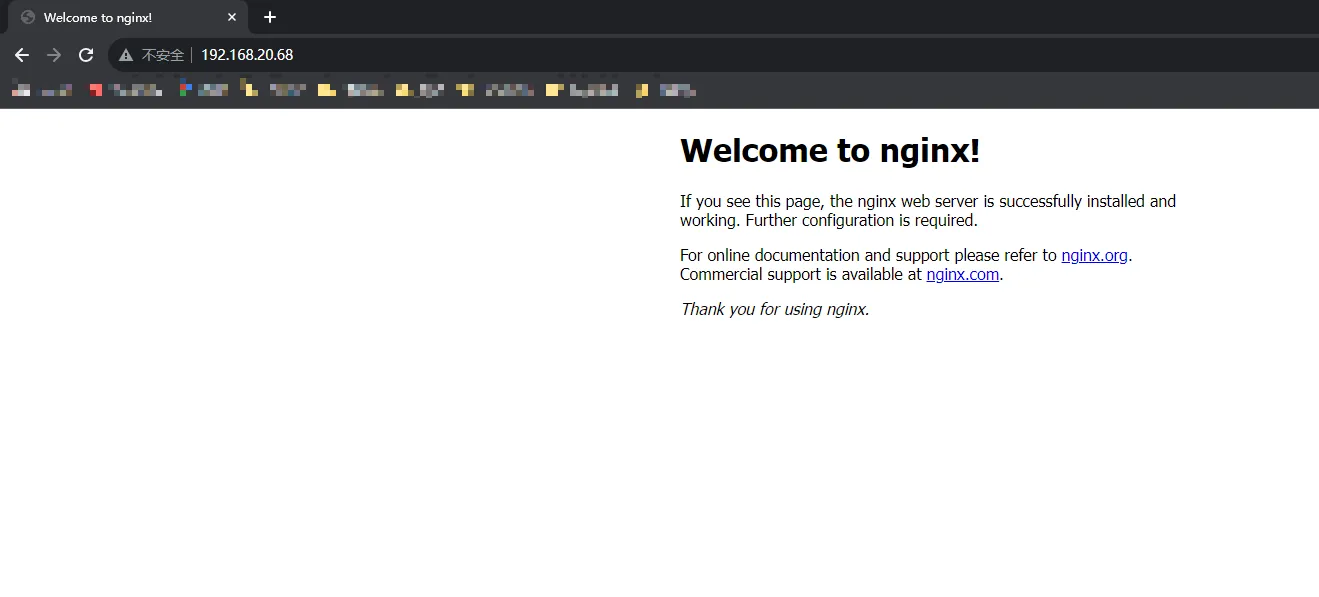
在浏览器输入自己服务器访问ip,显示如下这完成安装

nginx相关命令
bash# 检查配置文件是否有误
/data/apps/nginx/sbin/nginx -t

# 重置配置文件
/data/apps/nginx/sbin/nginx -s reload

# 启动nginx
/data/apps/init.d/nginx start

# 停止nginx
/data/apps/init.d/nginx stop

# 重启nginx
/data/apps/init.d/nginx restart
本文作者:ruiwiki
本文链接:
版权声明:本博客所有文章除特别声明外,均采用 BY-NC-SA 许可协议。转载请注明出处!
目录
